This section walks through the process of using the Wizard for the first time.
A quick introduction to the wizard is given by explaining how to use the Wizard to generate, and use, Java classes which encapsulate a database table.
If your intended JDBC driver is capable of using scrollable resultsets, please follow this section instead.
JDatabase Wizard needs JVM 1.3 on the machine where it is run. The JDBC driver(s) should be JDBC 2 compliant. The code generated can be configured to run using JDK 1.1, 1.2 or 1.3, and JDBC 1.0 or 2.0.
If the JDK 1.3 is installed as your default JVM, double clicking on the J3Wizard jar file should start the wizard.
The Wizard can be started manually, by launching com.j3.swingUI.Main in the Jar file, for example:
C:\temp>java -cp C:/temp/J3Wizard.jar com.j3.swingUI.Main
The above would be used if you needed to setup your JDBC driver classpath separately. The classpath to your preferred JDBC driver jar or folder can be set from within the Wizard.
JDatabase Wizard can take a project file as a parameter, for example:
C:\temp>java -cp C:/temp/J3Wizard.jar com.j3.swingUI.Main C:\temp\MYPROJECT.j3
When the above command is issued, JDatabase Wizard starts up, and attempts to open the project file MYPROJECT.j3
When first running the Wizard, a project needs to be created.
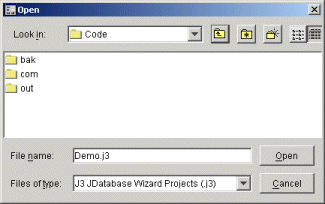
In the File menu select "Open/New Project...", and enter the filename you would like your new JDatabase Wizard project to use. The file should end with a .j3

Once the project file is open, we can connect to the database, using any drivers which are in the classpath. This includes the JDBC-ODBC bridge.

The Profile drop down list box can be used to initialise the other fields. In the above example the JDBC:ODBC bridge is chosen to initialise the other fields. In the example above, the database URL needs the <Data Source Name> to be changed to the actual datasource used.
Once connected, we can select the database menu entry called "Database View".
Introspect Checked Items allows you to select what database objects you are interested in. By only selecting the items of interest, the Wizard can respond considerably faster.
The Test button does Class.forName("sun.jdbc.odbc.JdbcOdbcDriver") in the above example. An error message means that the JDBC driver class is either incorrectly spelt, or not on the classpath.
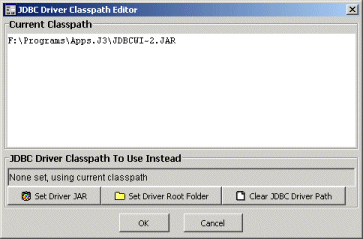
The Edit... pops up a dialog, which can be used to point to the JDBC driver jar file, or root folder of the dirver class:
The wizard generates Java code to interact with the database. In order for the wizard to be able to decide which Java types to use for each database entity type, the wizard uses a type map. The following link describes type mapping in detail.
The database tab is the first tab seen when flipping to the database view.
In most circumstances, it is not necessary to change information on this tab.
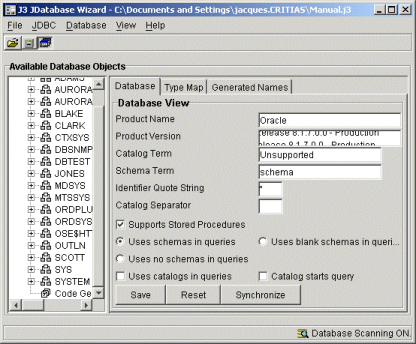
To create a class, we need to drill down the database tree, to select the database object for which a class is to be created.
It is worth noting that several Java classes can be created for a given database object. So we could have one class which encapsulates only the EMPNO and ENAME. And have another class which encapsulates every column in the EMP table.
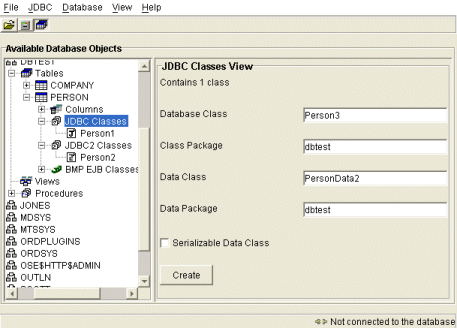
The database wizard will generate two classes. On class holds a table's data (data class). The "Database Class" is used to insert, update, delete and select data, using the data class to pass data.
The above panel allows class names and packages to be specified. Default values can be used. Press the "Create" Button.
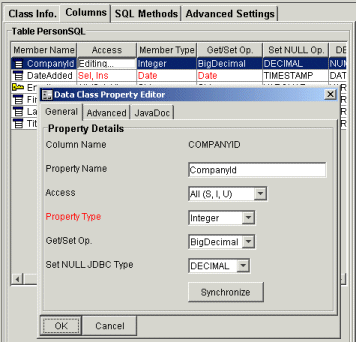
Now we should review the table columns the classes are to encapsulate. For example, which are used in select, insert and update calls. This will determine the members of the generated data class, and how the JDBC SQL calls should be generated.
Below is the columns' view of the class. Defaults can be changed from here by double clicking on any entry in the table. In most cases only the access for a few columns will need their access changed to specify which columns to use in the SQL select, update, insert statements, and hence which ones appear in the generated data class.
Now we are ready to create JDBC methods to select, update, insert and delete records in the table.
Below is a snapshot of an example SQL Methods tab:
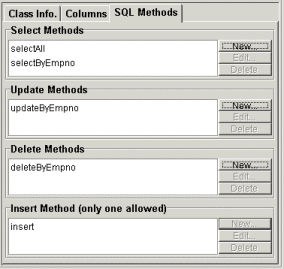
From this tab we can specify new database access methods, delete them, or modify existing methods. The next section walks through the creation of a Select method.
The JDBC class generated will have a method of the form void "selectByEmpno(BigDecimal CustomerID)", in order to specify this the Select Statement Editor is used.
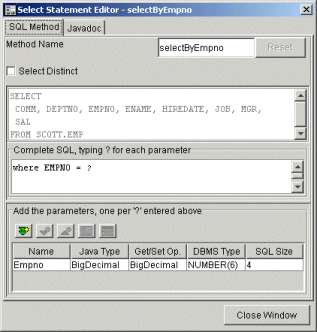
Please note the following when completing the SQL, if a parameter is a string, it should not be put in quotes:
where ENAME = ?
When adding a new parameter, or editing an existing one, the following dialog pops up:
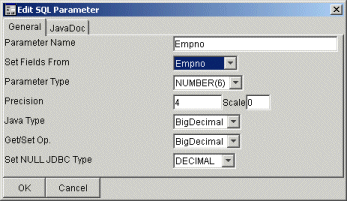
The precision and scale are not used by the wizard at present, but a future version may well provide additional functionality based on the precision and scale values.
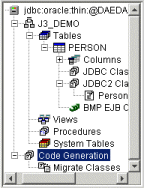 To
display the code generation options, the last entry in the tree on the left
hand side of the window should be selected. To
display the code generation options, the last entry in the tree on the left
hand side of the window should be selected. |
The following tab set is displayed:
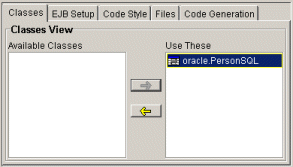
Select the root folder of the project. That is where the java code files are generated.
The classes to generate can be set by selecting available classes and pressing the correct arrow button.
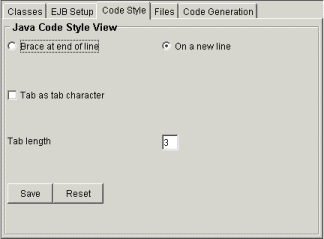
This tab allows the style of the code generated to be specified. If any changes are made to the fields, the Save button should be pressed.
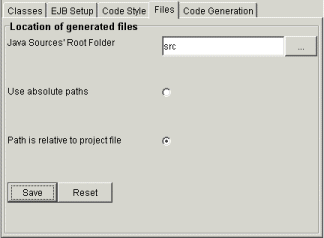
The files can be generated using absolute file paths, or paths relative to the project file. The root folder can be selected by pressing the "..." button, or by entering the location in the textfield.
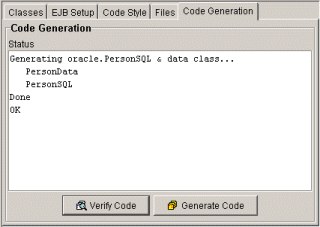
To generate code, the "Generate Code" button needs to be pressed. A status is displayed to show what classes are currently being generated, and if any problems have occurred.
The wizard generates two classes. A Data class and a Database class.
public class Emp
{

   /**
   * Close any open ResultSets and Statements
   */
   public void close()

   /**
   * Deletes records in the database
   * @param theConnection The OPEN JDBC Connection used by this method
   * @param theEmpno value to pass to the parameter Empno
   * @throws SQLException An unexpected JDBC event occurred
   */
   public void deleteByEmpno(Connection theConnection, BigDecimal theEmpno) throws SQLException

   /**
   * Creates a new record in the database
   * @param theConnection The JDBC Connection to use
   * @param theInsertData The data used to create one record
   * @throws SQLException An unexpected JDBC event occurred
   */
   public void insert(Connection theConnection, EmpData theInsertData) throws SQLException

   /**
   * Retieves the next row of data from the resultset
   * @throws SQLException An unexpected JDBC event occurred
   * @return An instance of the data class
   */
   public EmpData next() throws SQLException

   /**
   * Selects records from the database
   * @param theConnection The OPEN JDBC connection to use
   * @throws SQLException An unexpected JDBC event occurred
   */
   public void selectAll(Connection theConnection) throws SQLException

   /**
   * Selects records from the database
   * @param theConnection The OPEN JDBC connection to use
   * @param theEmpno value to pass to the parameter Empno
   * @throws SQLException An unexpected JDBC event occurred
   */
   public void selectByEmpno(Connection theConnection, BigDecimal theEmpno) throws      SQLException

   /**
   * updates records in the database
   * @param theConnection The OPEN JDBC connection to use
   * @param theUpdateData The data used to update the database
   * @param theEmpno value to pass to the parameter Empno
   * @throws SQLException An unexpected JDBC event occurred
   */
   public void updateByEmpno(Connection theConnection, EmpData theUpdateData,      BigDecimal theEmpno) throws SQLException
}public class EmpData { /** * Empty constructor */ public EmpData() /** * Constructor to create a copy of the passed class * @param theToCopy Class instance to copy */ public EmpData(EmpData theToCopy) /** * Sets all properties to null */ public void clearProperties()/** * column property get */ public BigDecimal getComm() public BigDecimal getDeptno() public BigDecimal getEmpno() public String getEname() public Timestamp getHiredate() public String getJob() public BigDecimal getMgr() public BigDecimal getSal()/** * column property set */ public void setComm(BigDecimal theComm) public void setDeptno(BigDecimal theDeptno) public void setEmpno(BigDecimal theEmpno) throws NullPointerException public void setEname(String theEname) public void setHiredate(Timestamp theHiredate) public void setJob(String theJob) public void setMgr(BigDecimal theMgr) public void setSal(BigDecimal theSal) }To insert a new record, the EmpData class is created, fields set, then insert() is called on the Emp class. Update and delete methods work in a similar way.
To select one or more records, the selectAll() is called on the Emp class. Emp.next() returns the record's data, or null, if all records have been read.
The Database class closes resultsets and statements when the end of the resultset is reached. It is a good idea to call close() on the Database class once it is not needed anymore, this allows the JDBC driver to release any resources it holds on the database.
Copyright © 2002 J3 Limited, all rights reserved